The following is a guide that covers how to set up your new Julio template on your Joomla! site. Here you can find an overview of the files included in the Julio CMMS release and instructions on installing and activating the template in your Joomla! install.
Note: The Julio Template install is only necessary if you did not use the Full Combo or Template Pack; otherwise it is already installed.
Step 1 - Installation
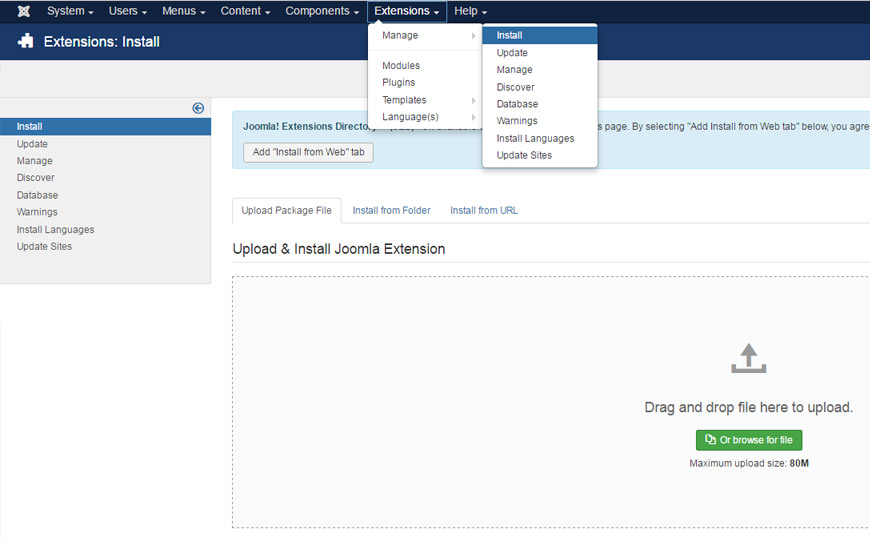
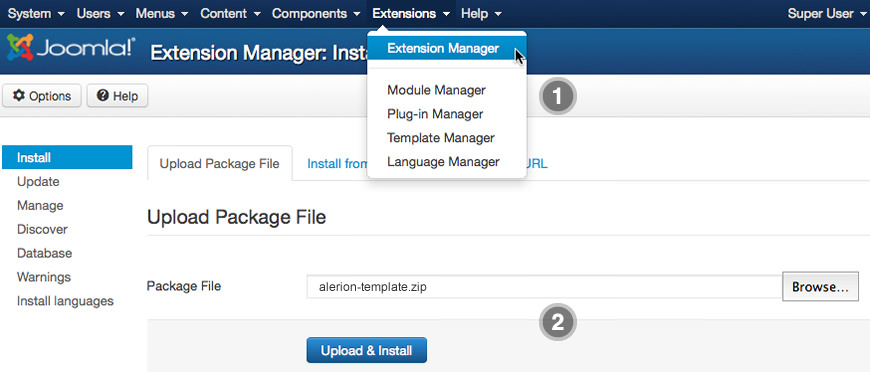
- Install from Admin → Extensions → Extensions Manager
- Browse for juliotemplate.zip and click Upload & Install, or drag and drop the file.


Step 2 - Template Default
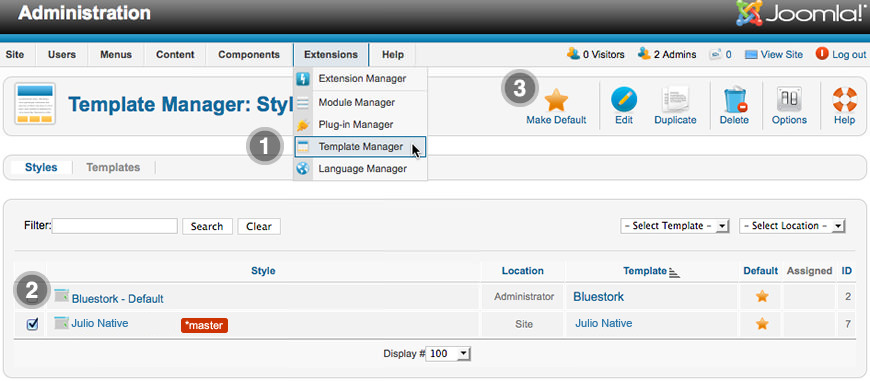
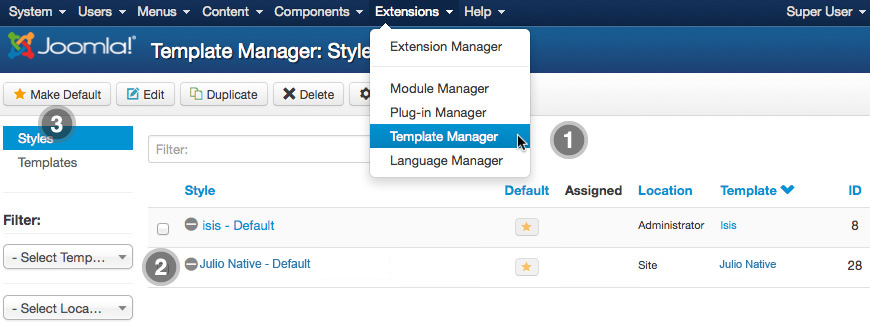
- Make the template default at Admin → Extensions → Template Manager
- Select Julio Native Template
- Press Make Default


Installing with Combo Pack
If you are installing with the Julio CMMS for Joomla! Full Combo Pack , then take the following steps. It must be installed as new, and not over an existing Joomla install. So don't try uploading it as a Joomla extension as you did with the ones above.
Step 1 - Upload
- Download the Full Combo zip file
- Unzip the file
- Upload the created folder to your server
Note: You can upload all the files via FTP, or use cPanel or SSH to upload the zip and unzip directly onto the server. Enquire with your hosting provider.
Step 2 - Installation
- Go to www.yoursite.com/*folder name*
- Follow the Installation instructions
- Remove the installation folder in the Installation interface

